Chart Vizzard
Vizzlo's AI-based chart generatorHow to make a Timeline in Word
How to make a timeline in Microsoft Word
This step-by-step Microsoft Word timeline tutorial will show you ways how to make professional timelines right inside Microsoft’s popular text processing tool.
You will be enabled to create a basic timeline that you can adjust and style manually. In the end, you will be able to create a simple graphic suitable for presentations or reports created for your clients. Because Microsoft Word is a widely used text processing tool the benefit is that many of the steps might be familiar to you. On the downside, using Microsoft Word to create a timeline might lack drag and drop simplicity, or the flexibility you need to show more accurate details or update the timeline on a regular basis.
If you need to create and update timelines regularly for your slides and reports, you might use a free online timeline generator. Vizzlo offers an easy-to-use and fast solution PowerPoint add-in that will help you to automate this process. In this tutorial, you can read how to create a timeline using native PowerPoint features and how to use Vizzlo’s free online tool to make a timeline in PowerPoint automatically.
How to make a timeline in Microsoft Word manually using native feature
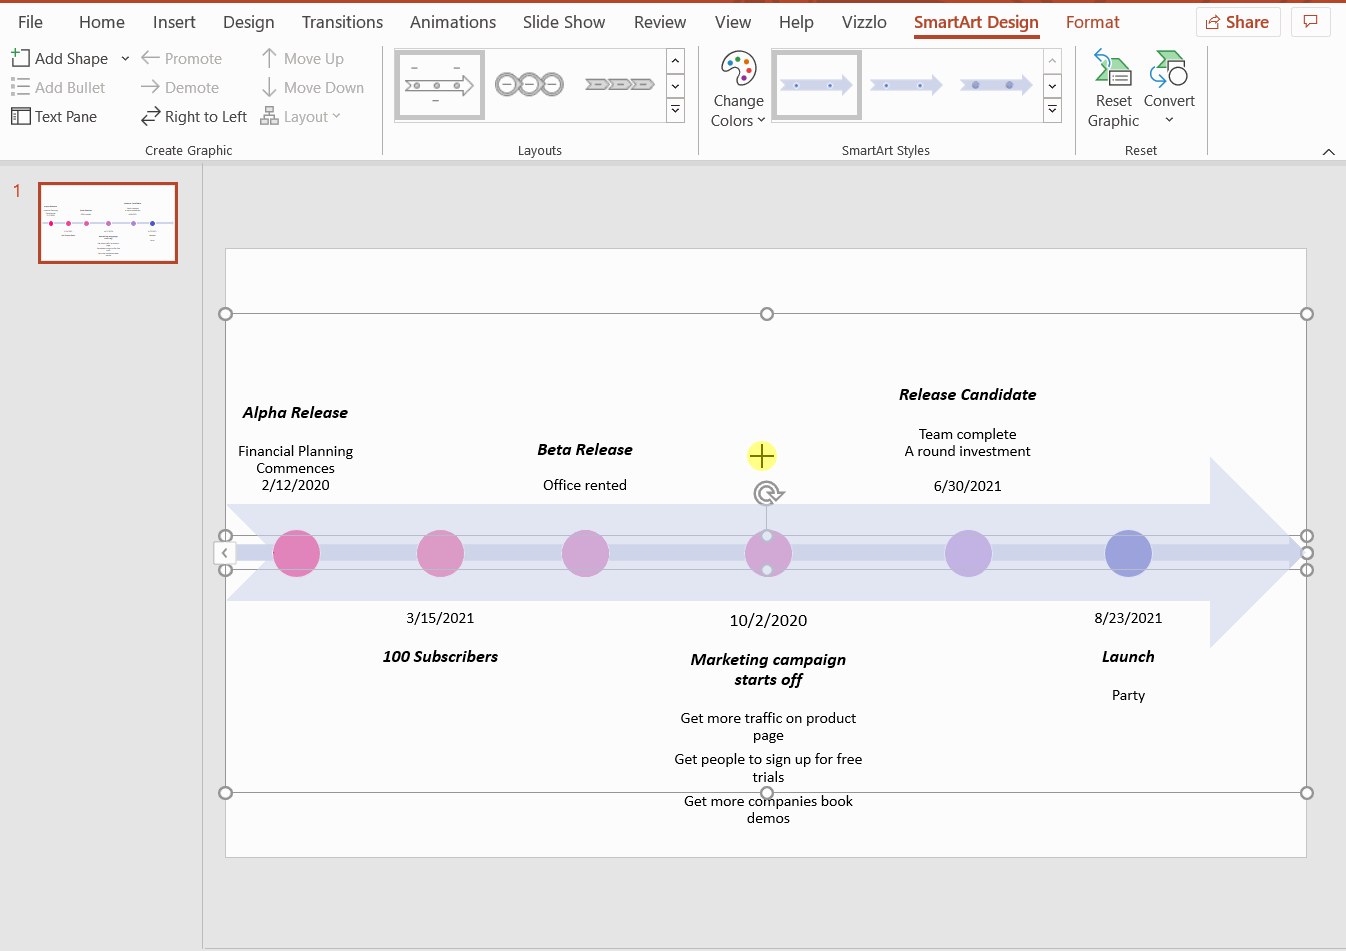
Create a Simple Timeline
-
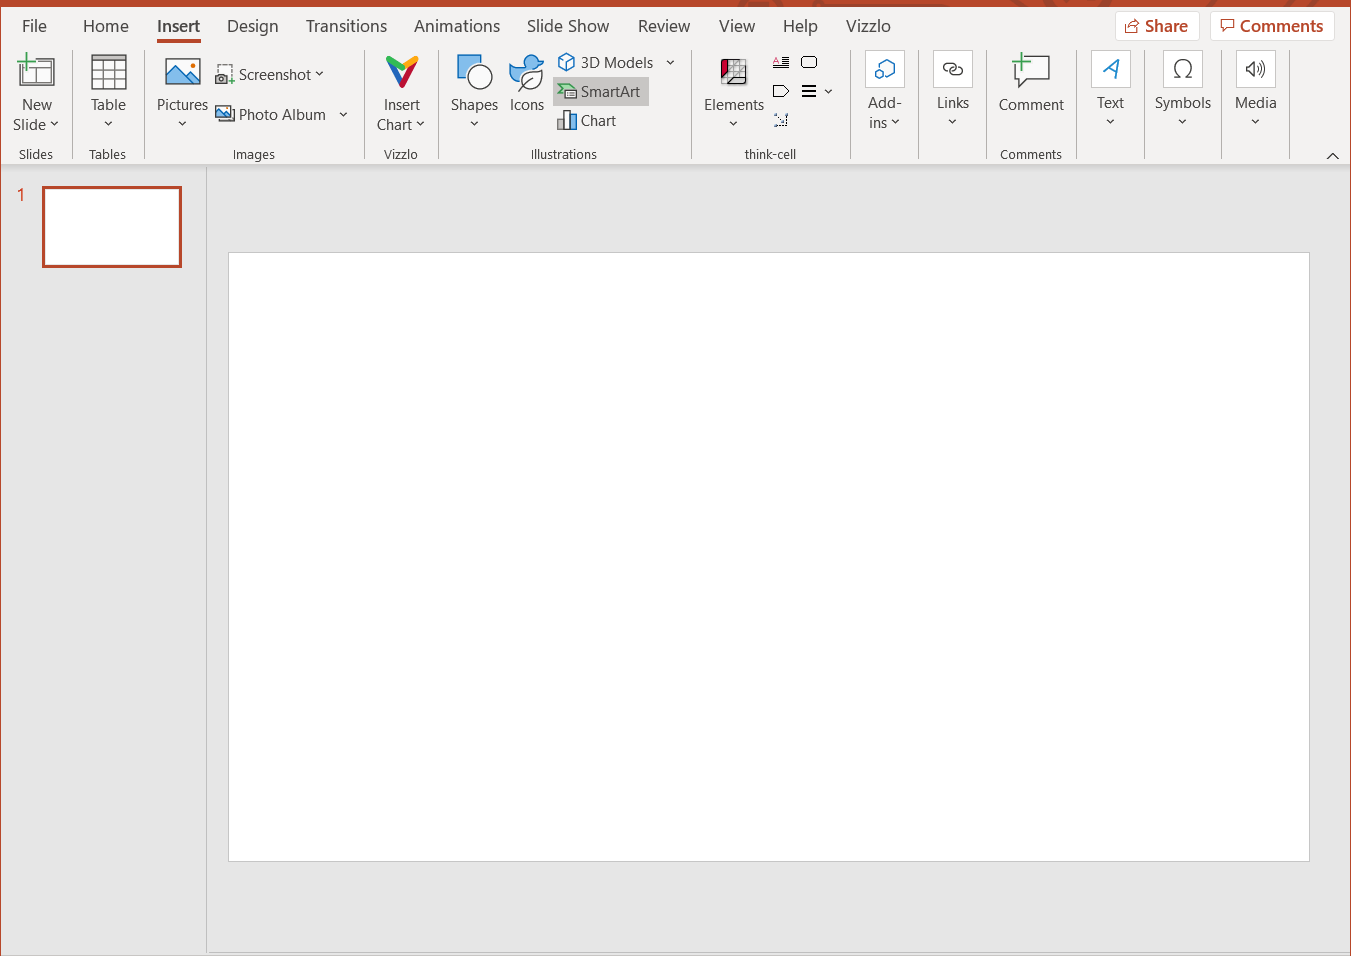
Create a new Word document or open an existing presentation and add a new slide

-
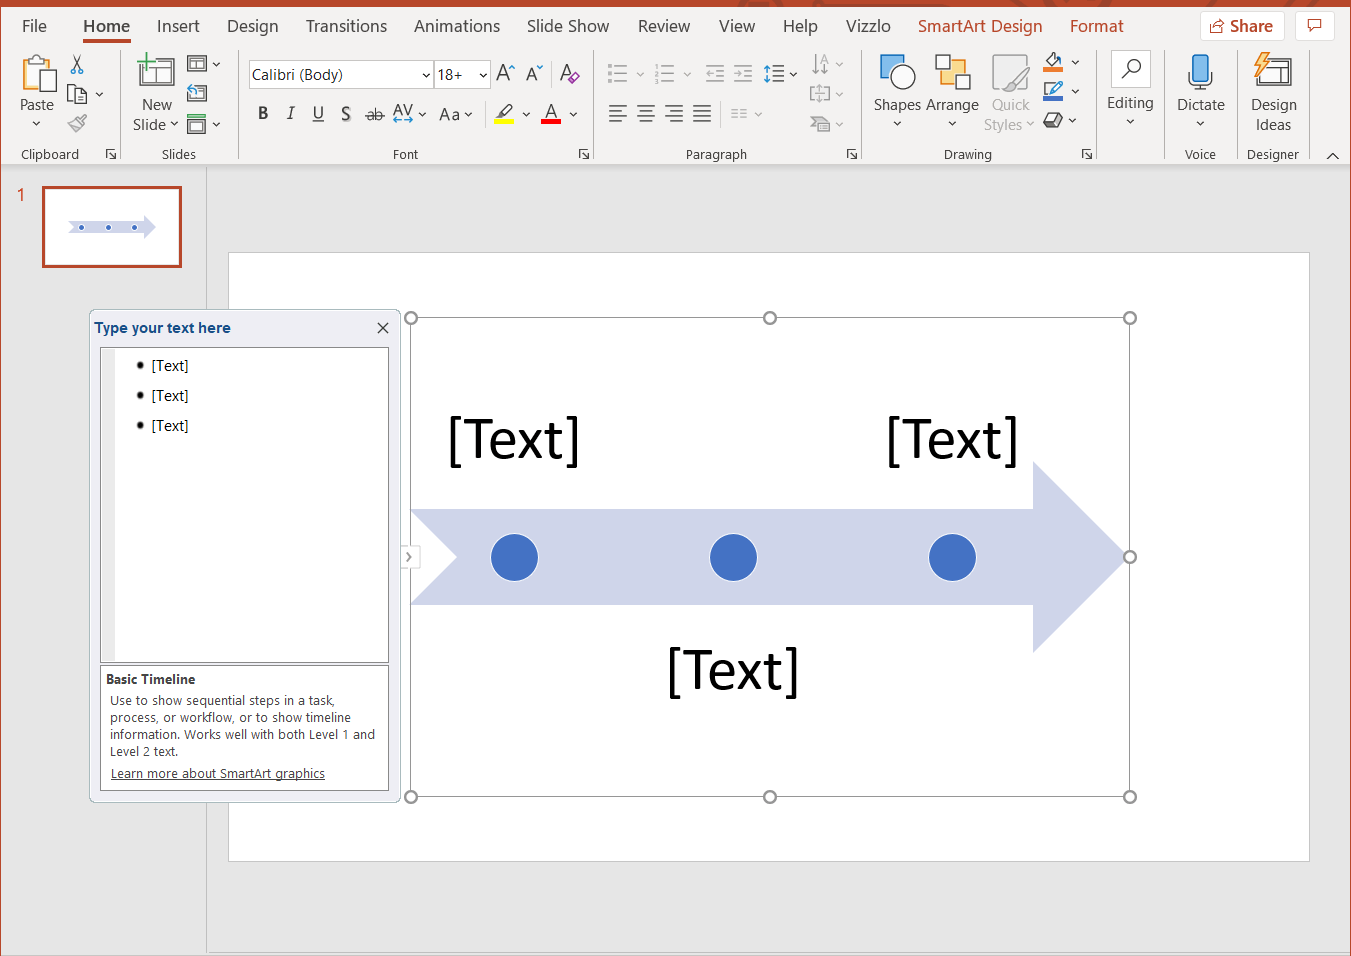
In the menu bar, click on the Insert tab and choose the SmartArt button. There you will have the option to choose from different SmartArt Graphics. To create a project timeline, choose from the template section Process and then pick Simple timeline
-
Try out different styles and templates from the selection at any time.
Add your data
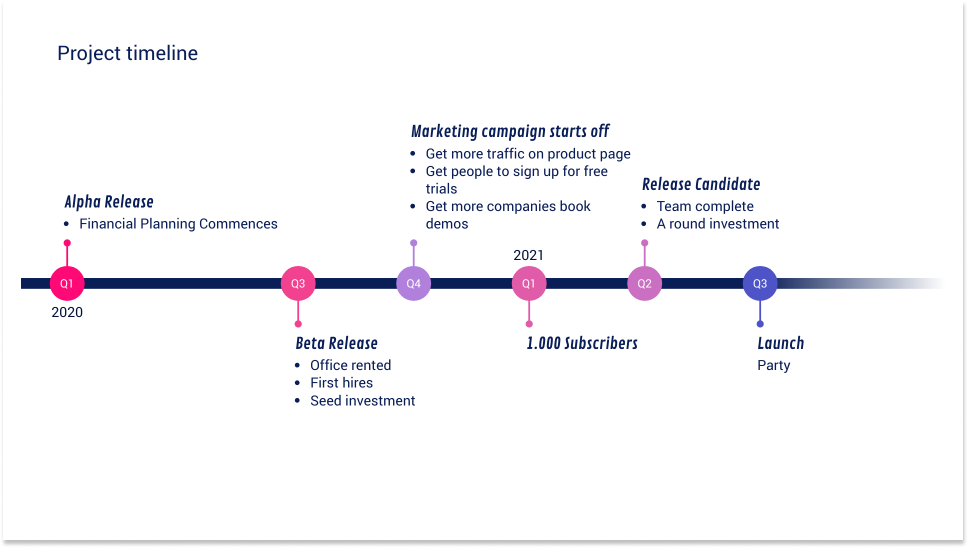
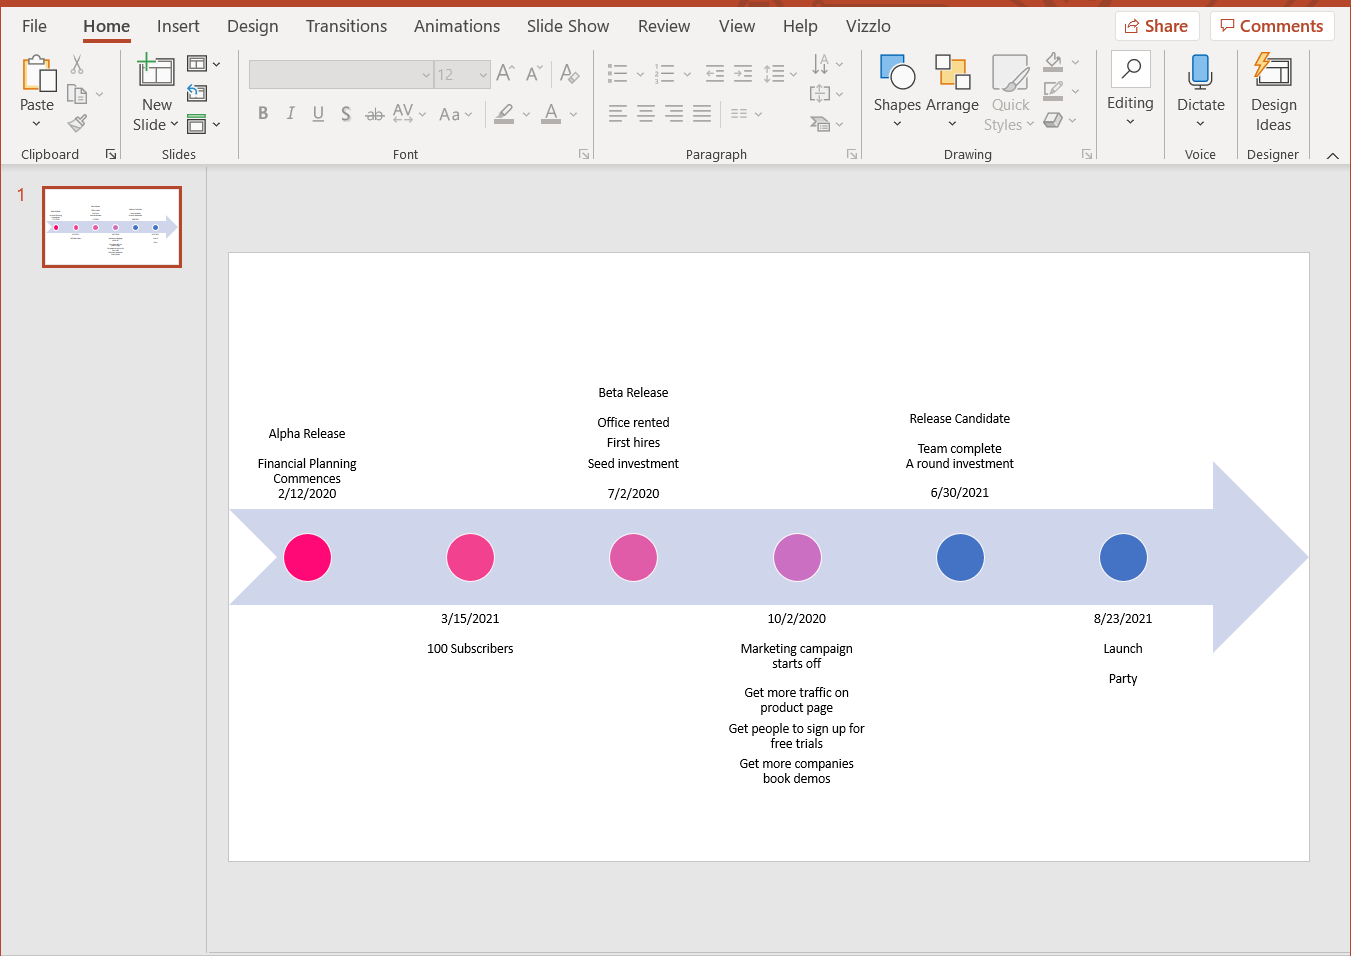
By default, the Simple timeline will show 3 milestones and placeholders for your text. Click in the milestone’s [Text] or use the text pane instead. Press Shift + Enter to insert a line break. When you use the text pane, you can easily enter more milestones. Click Enter and you will see another bullet point. Word will adjust the font size automatically depending on the number of events and the amount of text you enter.
As you notice, the milestones are positioned on the horizontal axis with the same distance between them. Irrespective of the dates you inserted.
Customize your timeline
Word offers you many ways to style your timeline. The way you set colors, font properties etc. will affect the perception of your timeline. A client might have their brand colors, font type - all can be adjusted with a few clicks manually.
Before we show you how to change a timeline, note that SmartArt offers you different templates that change the overall look of your timeline. In the menu bar, click on the SmartArt Desgin tab, then open the SmartArt Styles menu and browse the options.

Adjust the font properties of your Events
Word allows you to change the font family, font weight, font color etc. using Rich Text Formatting. Select the text you want to change and use the Rich Text Editor that will then show up.

Change the color of your Milestones
Select any milestone using right-click. This will open a menu in which you can change the fill color, outline color and much more of the selected milestone.
Change the color and width of the timeline axis
It is possible to change the color of the axis just the way you change the color of like you the milestones: right-click on the arrow and use the menu that will then open. Besides the color, you can also change the width of the axis which will help make the milestones stand out more to deliver the message of your timeline.
Change the position of the milestones
You can use drag and drop to change the position of a milestone, vertically and horizontally. Moving the milestones closer to their description text will make it easier for the readers of your graphic to make the right connection between circle and text.
How to make a timeline in PowerPoint automatically
It is certainly possible to create professional looking timeline using Word’s build-in SmartArt features. This approach has a few limitations though. There is no easy way to adjust the position of the milestones by the actual date they represent. Adjust the colors and fonts requires manual work. If you work for different clients that all have their brand guidelines this is time-consuming. An easier way is to use an online timeline generator or a PowerPoint add-in.