Chart Vizzard
Vizzlo's AI-based chart generatorCreate a Venn Diagram in Excel
Those of you looking for a quicker, easier and more beautiful way to create your Venn diagrams should check the short video below explaining the Vizzlo method. Everyone who wants slower, more difficult and markedly less beautiful Venn diagrams, keep scrolling for the step-by-step guide to Excel.
Getting Started
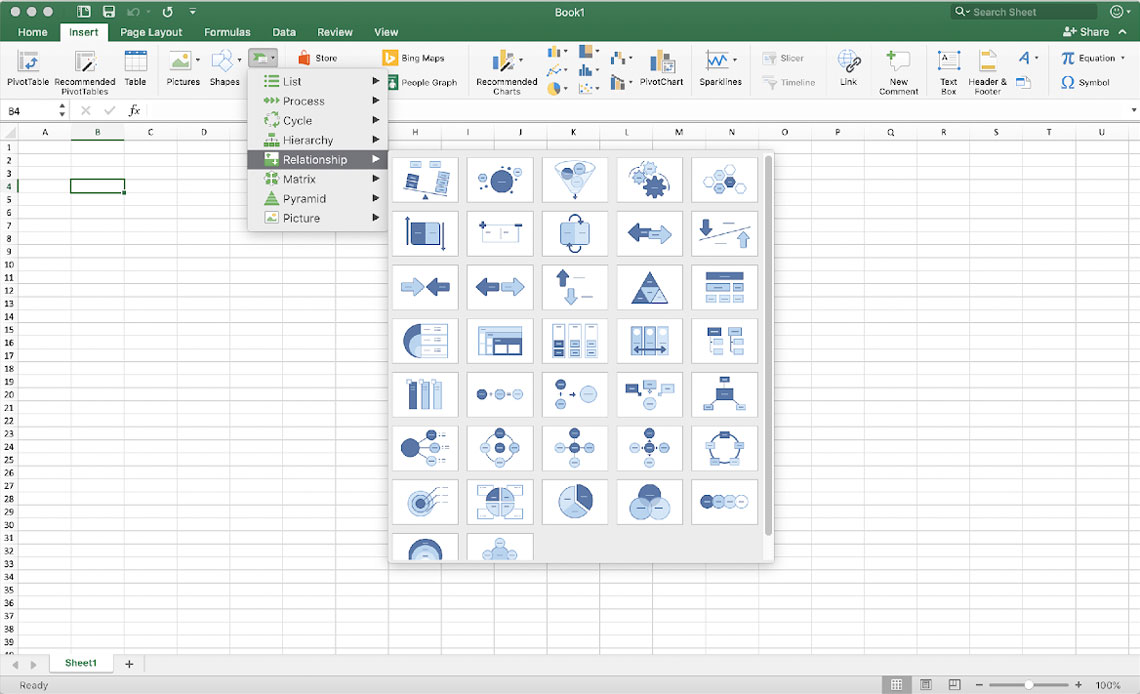
gi On the top of the page, select the “Insert” tab, in the “Illustrations” group, click “SmartArt.”
In the “Choose a SmartArt Graphic” gallery, click “Relationship,” and choose a Venn diagram layout (for example “Basic Venn”), and click OK.
Adding Labels
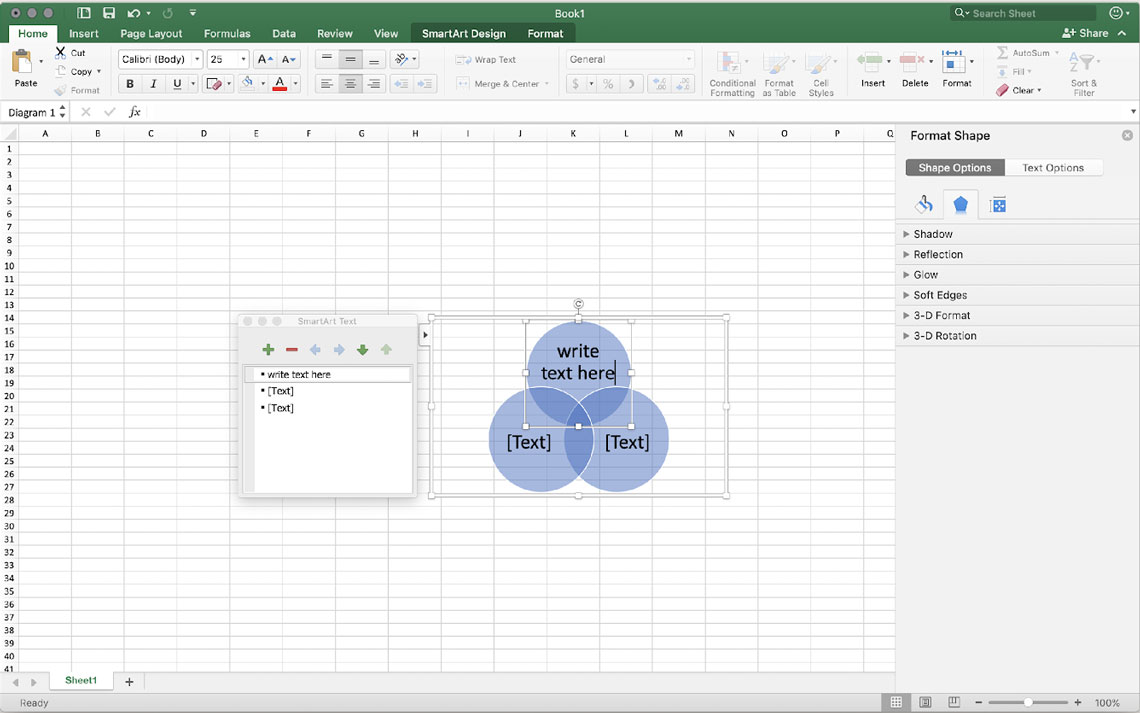
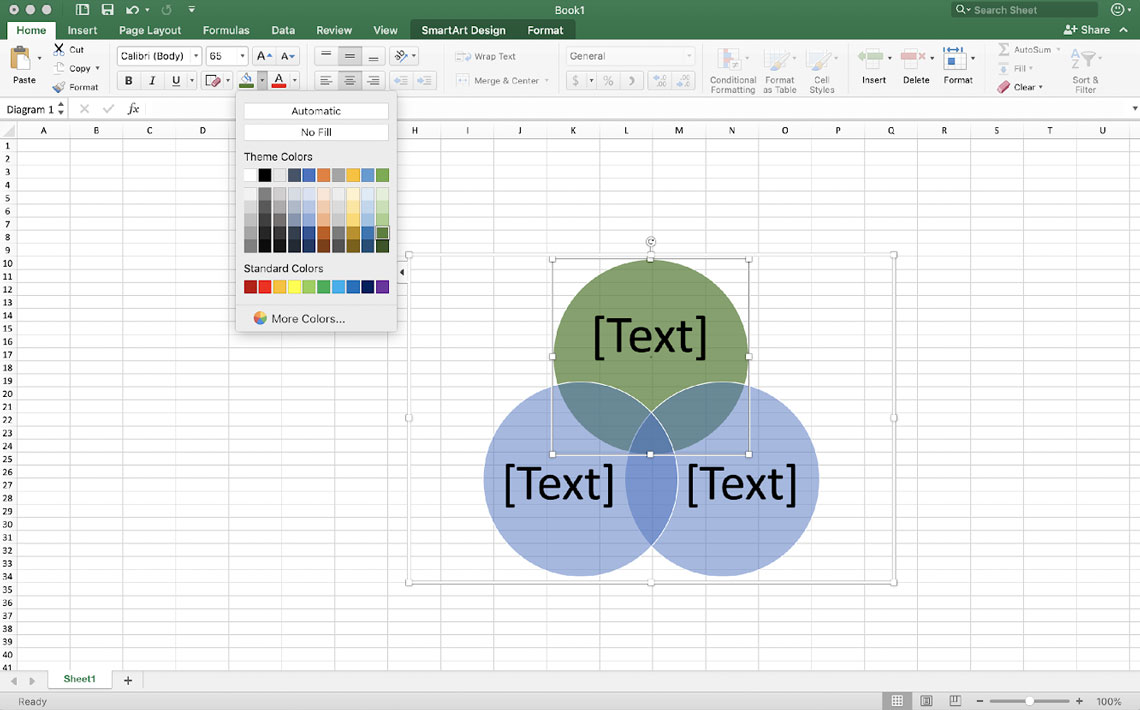
To add text, either click on the text panel of the desired circle, or select one of the text fields in the “Text” pane that pops up next to your diagram and enter your desired text.
Tip: If you don’t see the text pane, you can open it by clicking on “Text Pane” on the upper left hand corner of your top bar.
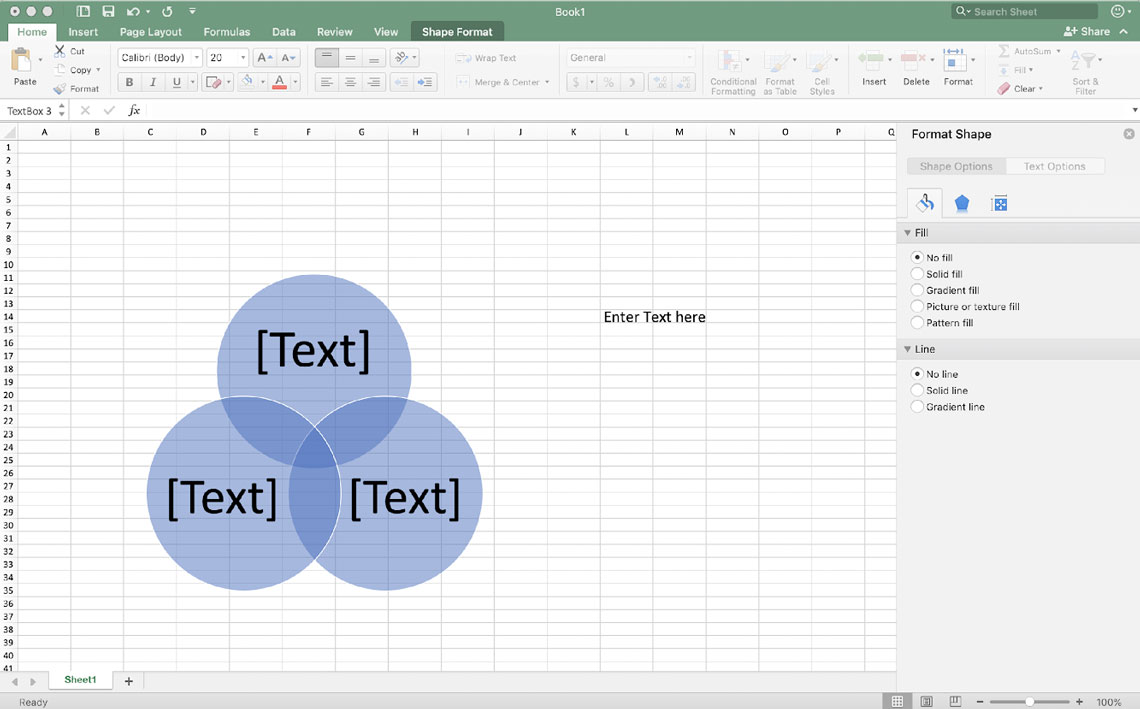
Note: There is no option to add text to the overlapping portions of your diagram currently in Excel, so we will work around it using text boxes. If you don’t feel like going through all that check out our Venn diagram creator!
-
In the “Insert” tab, select “Text Box” on the right side
-
Click and drag to create a text box
-
To change the background color, right-click your text box, select “Format” and, on the side pane that pops up, go to format shape and under fill select “No fill”
-
To delete the lines around the text box, select line in the format pane, and then select “No line”
-
You can now drag the text box to the desired position in the overlapping portions of your Venn diagram. (Click your text box and, when your cursor transforms into a four-headed arrow, drag the box where you want it).

To change the format of your text (font, size, etc.) simply select your text and use the normal formatting options on the home tab.
Think this is a bit convoluted? So do we! Vizzlo’s free Venn diagram creator lets you add labels with a simple click!
Change Color and Design
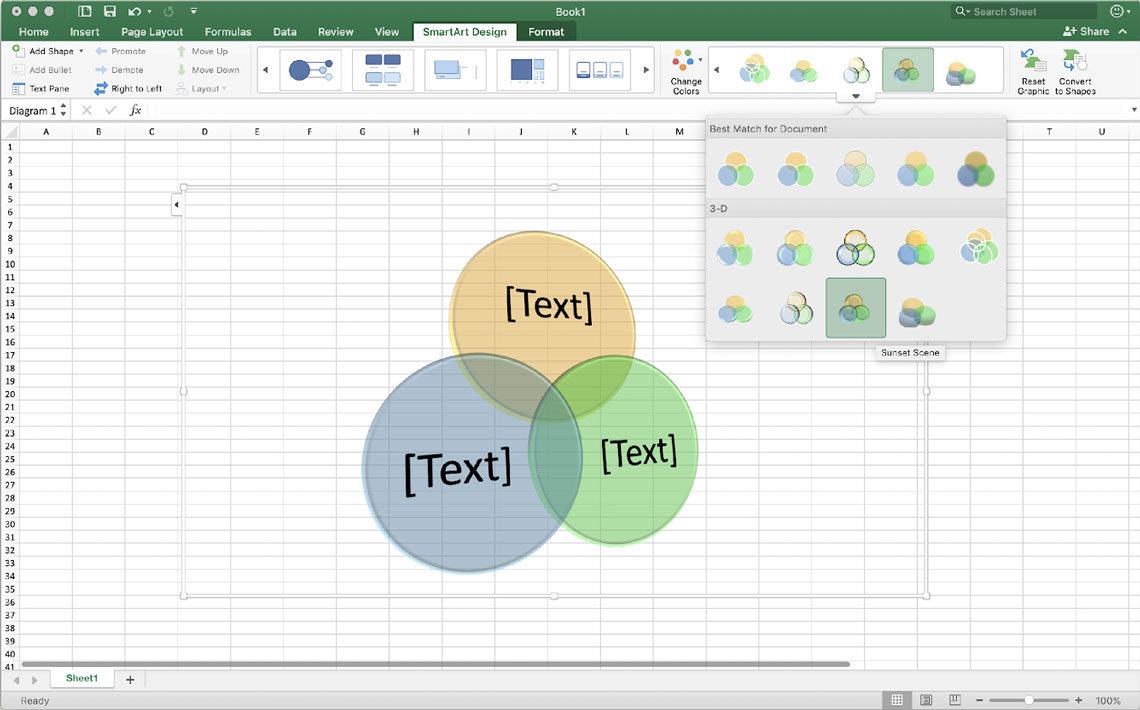
To change the color, you can use SmartArt presets by clicking on your diagram, selecting the “SmartArt Design” tab and selecting “Change Color.”
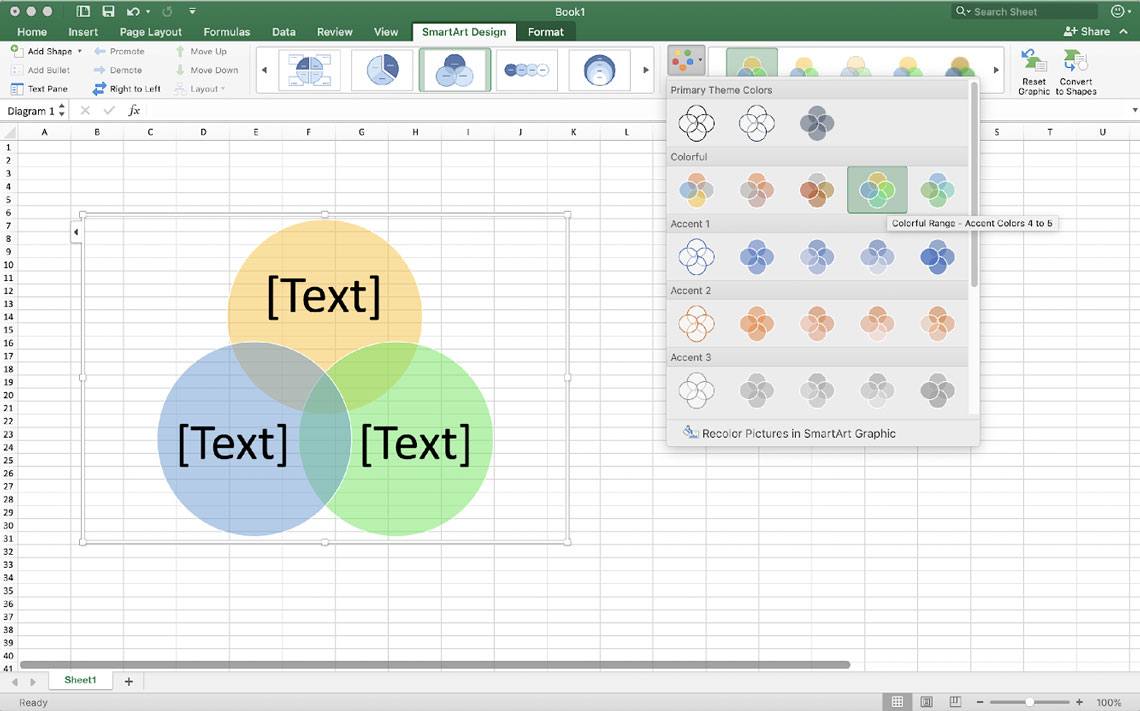
You can also change the colors of individual circles by selecting one and using the regular fill tool in the menu bar.
Tip: When changing color manually, keep the opacity in mind so overlapping areas stay visible.
However, if you want pre-made, designer-grade color schemes, check out our free Venn diagram creator!
SmartArt Style
A SmartArt Style is a preset combination of different effects, such as line style, bevel, or 3-D rotation that you can apply to your Venn diagram.
Click your diagram and, under the “Design” tab, use the “Styles”group located on the right, to preview and chose a style.
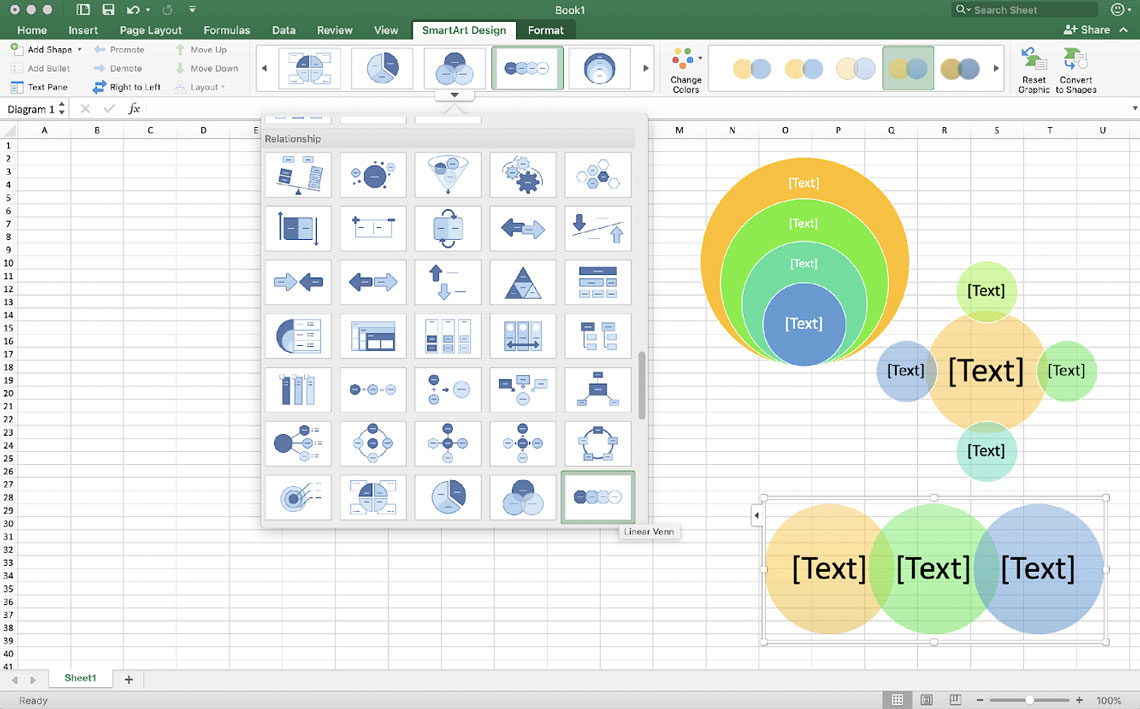
Change Between Different Venn Diagram Layouts
Right-click the Venn diagram that you want to change. Choose a layout in the “Layouts” group on the “Design” tab.
When you hover a layout option, your SmartArt graphic changes to preview the new layout.
Selecting the Right Layout
If you want to show overlapping relationships in a sequence, select “Linear Venn.”
For overlapping relationships with an emphasis on growth or gradation, select “Stacked Venn.”
For a diagram focusing on relationships to a central factor, click “Radial Venn.”
Without SmartArt
If you have no access to SmartArt, there is always the option to create your Venn diagram manually. If you create your Venn this way, keep in mind that there is no way to make your circles correlate to any numbers you might have in your sheet.
-
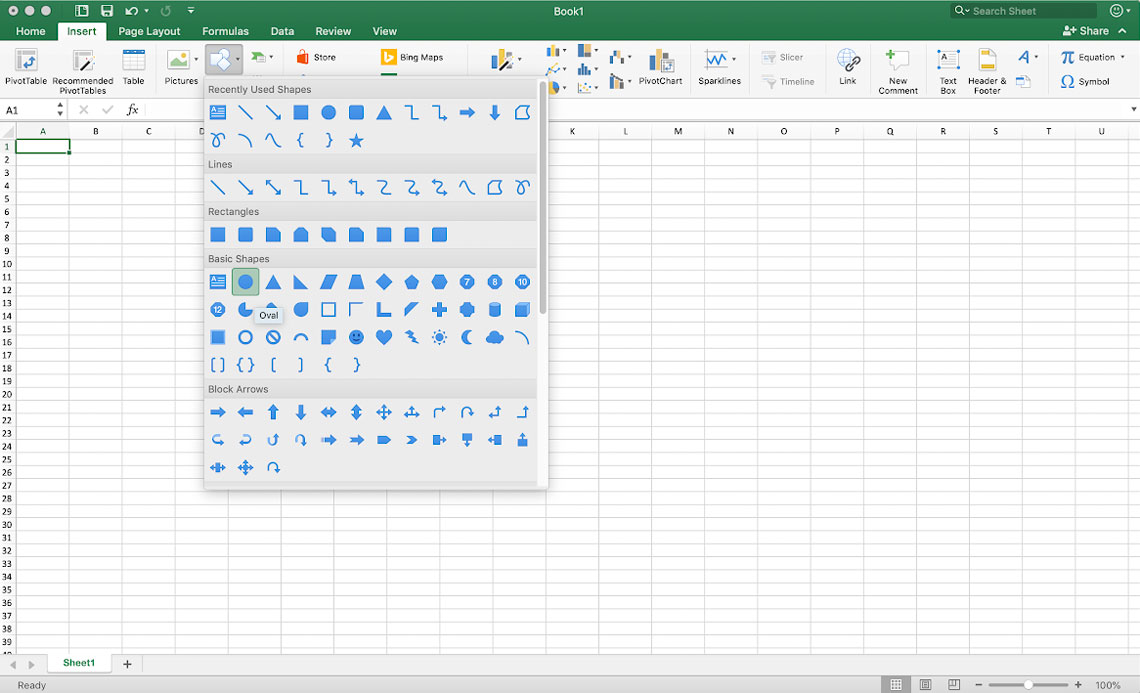
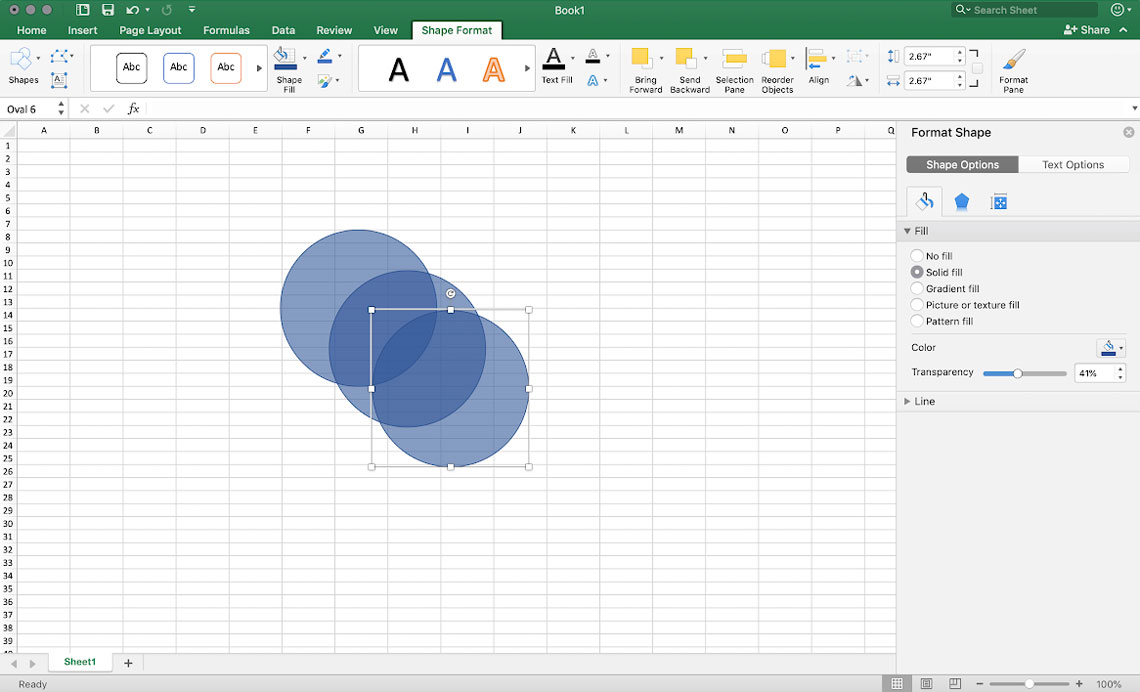
Create a circle with the “Insert Shape” function by selecting the “Oval” option. By clicking and dragging your mouse, if you hold down shift, the shape preserve its proportions, i.e., doesn’t go into an oval from and always stays a circle.
-
Format the circle to your liking by right-clicking and selecting “Format Shape.” Here, you can change color, keep in mind to turn down the transparency and “Solid Fill” to make the overlapping areas visible. Once you are happy with your format, copy & paste the circle to create multiple identical circles.
-
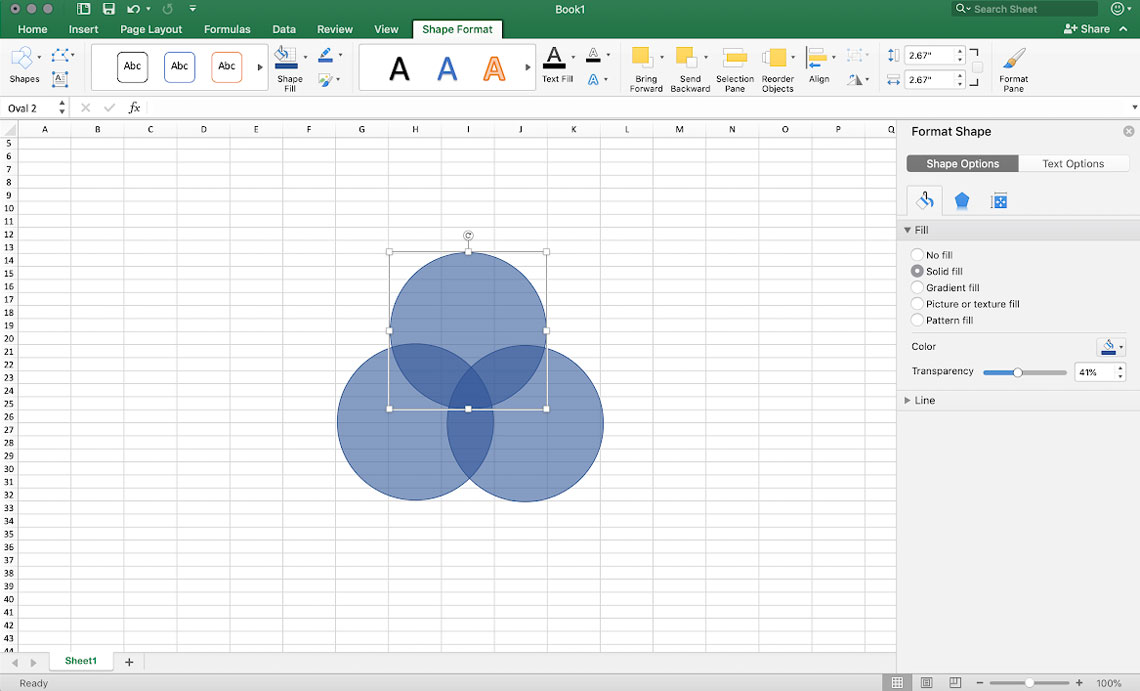
Arrange the circles in the way you want to convey your relationships by clicking and dragging them to the right position.
-
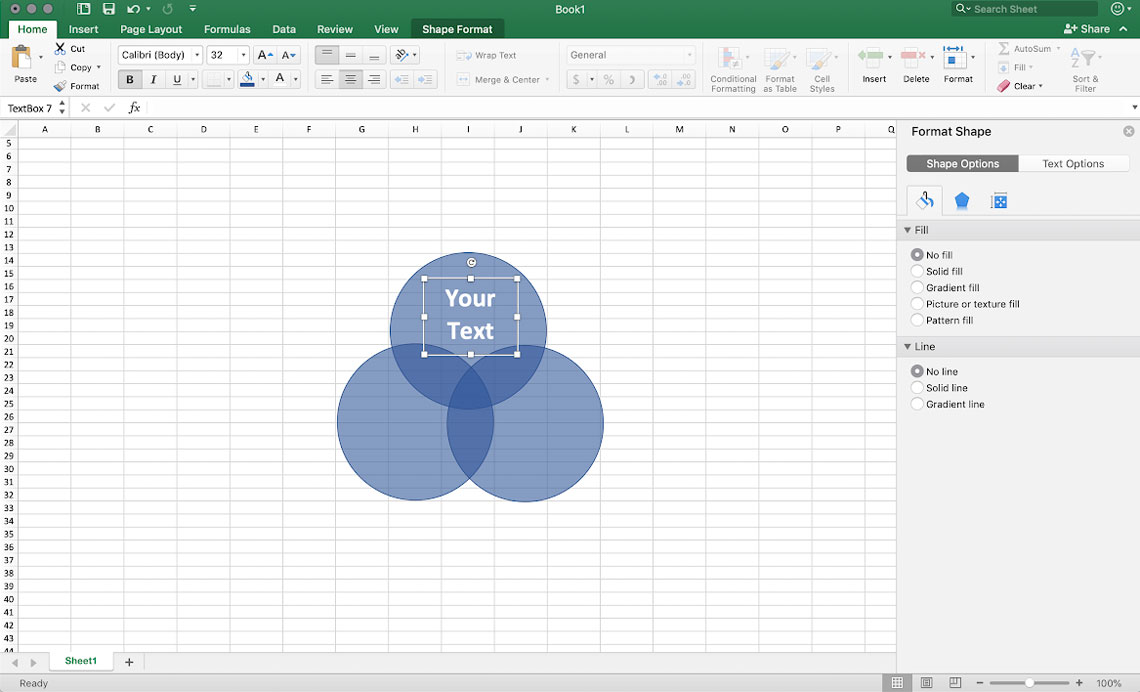
To add labels, create text boxes without fill or borders (“Format Shape” > “No fill” & “No line”), style the text like you usually would and drag the boxes to your desired positions.
Instead of going through all this trouble, check out Vizzlo’s free Venn diagram creator and make your own stunning diagrams within seconds!
Start designing your own charts and business graphics.
Try Vizzlo for free